One Sheet Mini Christmas Album
Looking for easy Christmas paper crafts? Make a One Sheet Mini Christmas Album from Carlene Eshelman and give it to a dear friend or close family member. Best of all, you only need one sheet of 12" X 12" double sided paper. Save yourself a trip to the craft store!

Materials:
- 12” X 12” double sided paper
- Scoring board/bone folder
- Scissors
- Liquid glue
- Four sheets of 3-1/2” square paper
- Two sheets of 3-1/2” square chipboard
- 2-1/2” square paper
- 20-1/2” ivory ribbon
- Stamped image
Instructions:
- Take 12” X 12” paper and score at 3”, 6”, and 9”.
- Turn it once, and score again at 3”,6”, and 9”. You should have 16 three inch squares.
- Cut left score mark column, from bottom of paper to the start of the fourth square. Leave the fourth square in tact.
- Cut the right score mark column the same way, leaving the fourth square intact.
- Turn paper 180 degrees, and cut middle score mark column, from bottom to the start of the fourth square. Your paper should now form the letter “m” or “w”.
- Start at one end, folding squares until you reach the end. When you get to a new row of squares, you can fold all to the right to be consistent.
- Leave the end squares as single squares, but start gluing the next two square pairs together. Continue to glue successive paired squares together. Leave the last square single.
- Cover all sides of chipboard squares with 3-1/2” square paper.
- Fold ribbon in half.
- Place center line of ribbon onto the middle of one of your covered chipboard pieces.
- Place a line of glue in the middle of the chipboard piece. Put ribbon onto glue line.
- Take the right end of your mini album squares, and glue to the chipboard piece with the ribbon.
- Leave a 1/2” extra of ribbon in the middle, then glue the ribbon to the center of the other chipboard piece.
- Glue the left side of the mini album squares to the chipboard.
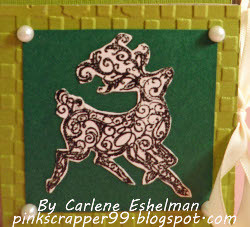
- Decorate the cover with your stamped image.
- Tie your ribbon together, and trim.

How to Make a One Sheet Mini Christmas Album:
Read NextEasy Sew Tote

