Portable Christmas Album
Looking for creative DIY gifts that everyone will love? Make a Portable Christmas Album from Carlene Eshelman and fill it with fun memories - it's a great gift that will be cherished forever! Use decorative papers, stamps and ribbon to create this adorable keepsake.

Materials:
- Two 12” X 12” double-sided papers
- 1-1/2” X 9” ivory paper
- 1-1/2” X 4” brown paper
- Stamped image, cut out
- 9” X 5/8” red ribbon
- Bone folder/score board
- Adhesive
Instructions:
- Score both 12” X 12” papers are 4”, 8”, then rotate and score at 6”.
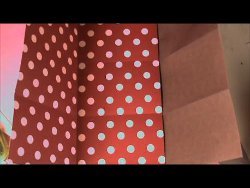
- Fold at score lines.
- Trim 1/16” off all sides of your 12”x12” papers.
- Lay one paper down on table, then stack second piece on top, joining one set of the rectangles.

- Glue papers together.
- Cut the scored lines in the middle of the papers. Make sure you trim 1/16” off the insides of each rectangle.

- Take the bottom and top rectangles and fold top edges down. Then small piece up. Glue down.
- On the opposite side, take the middle rectangle, and do the same folds as in #7. Glue.
- Fold right side, and left sides together. Then fold top and bottom of album in.
- Take your ivory strip and place glue down the middle. Place 9” piece of ribbon onto glue.
- Wrap ivory strip around your album. Make it slightly larger than the album. Glue flap down.
- Take 1-1/2” X 4 strip and glue over the seam side of your band.
- Glue your stamped image in the center of your band.
- Place band around your mini album.
How to Make a Portable Christmas Album:

